Developed over 16 weeks half-time using our in-house engine, we used Unity as the Level Editor. An area of responsibility for me was the development and planning of the Visual Scripting system. I also had responsibility over the scripting of in-game puzzles, various triggers and scripted events.
Design Challenges
Planning and developing a Visual Scripting system within a relatively short amount of time
Work with various limitations and come up with creative solutions to reach a finished game
Create easy to use tools and functions for other Level Designers and disciplines
The Visual Scripting system was developed within our in-house engine created during the development of Spite – Seeds of Corruption. The game engine was continuously worked on during the development of this game, Pelle Polis.
The testing of the Visual Scripting system had to begin as early as possible to make the most of the time we had during the project and to allow us Level Designers to start implementing the puzzles and various scripted events. This meant that a careful and thorough plan had to be made early in the project.
I worked closely with a programmer to create the Visual Scripting system, I stood for a lot of the planning and testing whilst the programmer stood for the creation of the system.
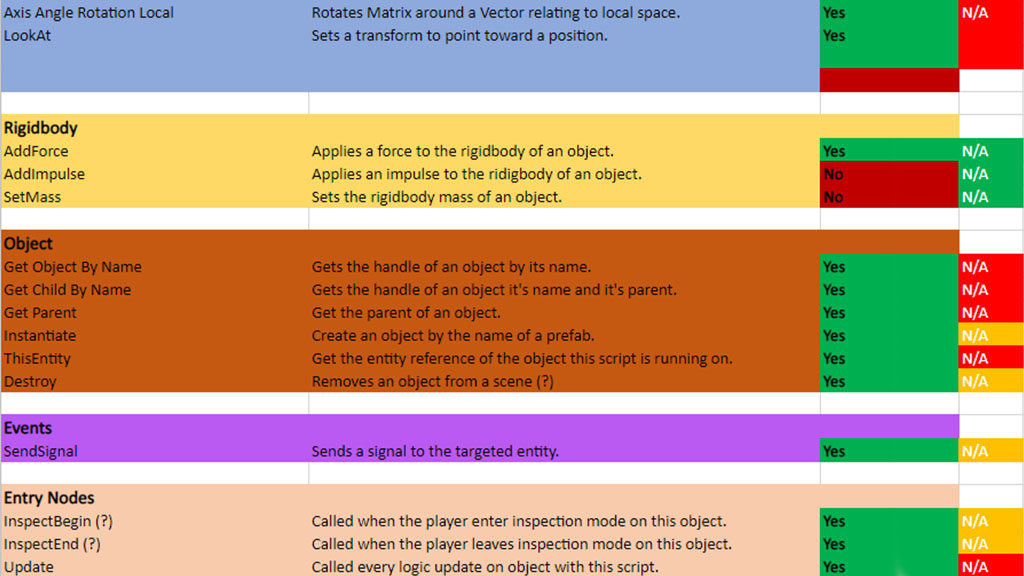
Together we created a big excel document where we listed all the nodes we thought was required to create Pelle Polis. Even this early we were cautious of overscoping, so only the most important nodes were written down. The goal was to maximize what we could do in the little time we had.
All nodes was prioritized by three levels of importance. Red meant that the node was absolutely needed and would hinder us from achieving what we wanted. Orange indicated that it would greatly streamline the visual scripting process but could be worked around. Lastly, green meant that, though it would be nice to have, it wasn’t needed to achieve the wanted results.
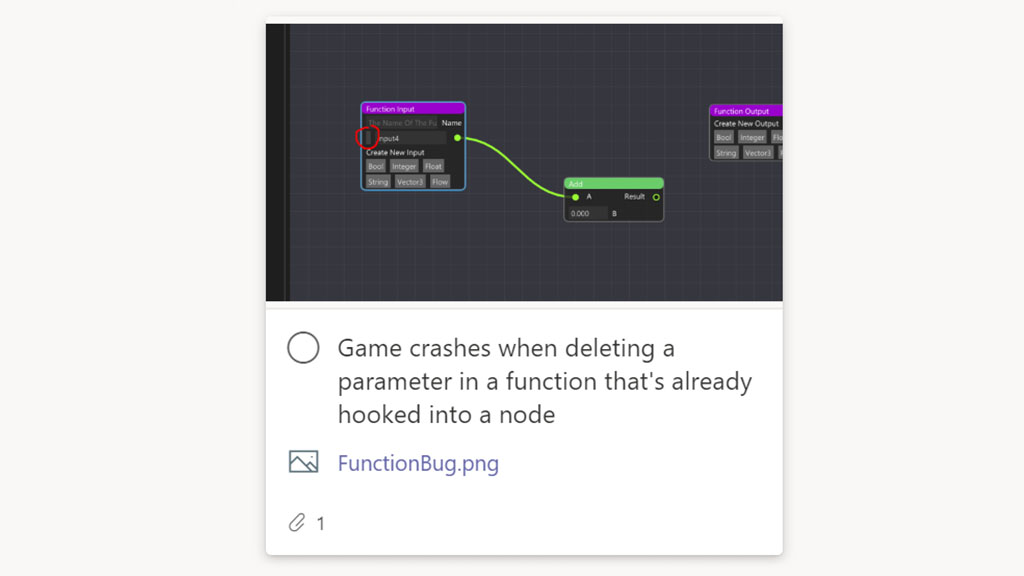
Throughout the development process I used the system to implement different puzzles and events, this gave me a good understanding of what had to be changed and what was important in terms of priority. Through an open dialogue with the programmer I provided feedback and bug reports.
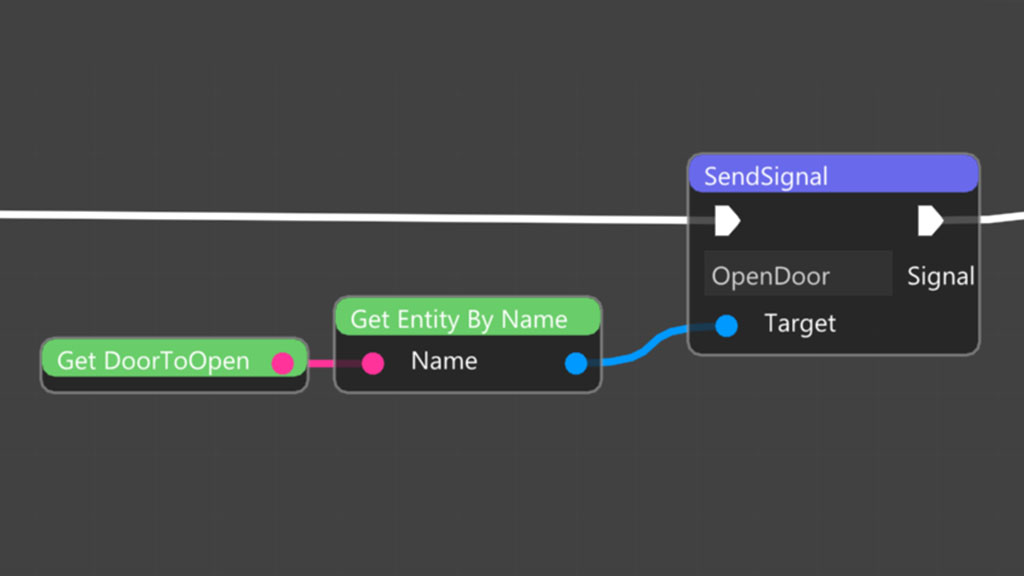
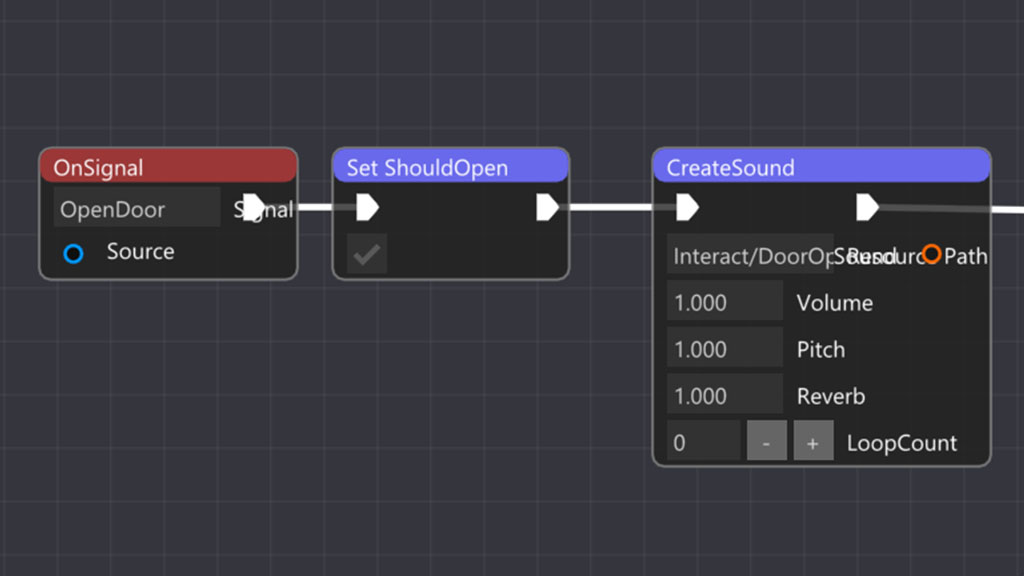
One thing that I found had a bigger impact than we previously thought was the nodes SendSignal and OnSignal, using these nodes it was possible to send or receive a signal from another script and entity. In the end this enabled us to create more advanced puzzles and tools. An example is being able to open a door by sending a signal, and then having the door do everything by itself, before this the door had to be manually opened in every script that wanted to open it.
Puzzles
All the puzzles in the game are made by me using the Visual Scripting system. It was a fun challenge working within the limitations of the system and extracting as much as possible from every aspect of it. These puzzles have gone through several iterations both because the Visual Scripting system has evolved, but also as a result of many playtests.
Combination Lock
This is the most used puzzle in the game, it features 4 knobs which can be turned and must be set in a certain combination to unlock.
Statue
Turning the head on this puzzle, lining up the numbers and then clicking the button will open a locked drawer. In it lies a note which reveals the correct combination for the bookcase puzzle.
Bookcase
In a certain bookcase the player must click three books in the correct order to open and reveal a hidden entrance to the dark crypts.
Radio
This is the most complex puzzle and features several knobs which changes the frequency of the radio. Two of the knobs control the volume and turns the radio on and off. Tuning the radio will reveal the player characters inner voice, which is trying to regain conscience and escape the hallucinations he’s experiencing.
Tools & Functions
To make parts of the Visual Scripting system easier to handle I made several Prefabs which could be placed in Unity and had preconfigured components. One of the prefabs were the TriggerBox prefab, this enabled other Level Designers or disciplines to easily place the trigger box where it was needed in Unity and then simply assign which script should be used.
Functions
Functions was a part of the Visual Scripting system that we could have gone without, but which would make a big difference in iteration times and help streamline the workflow. After implementing it I created several simple functions to help the workflow and keep iteration fast.
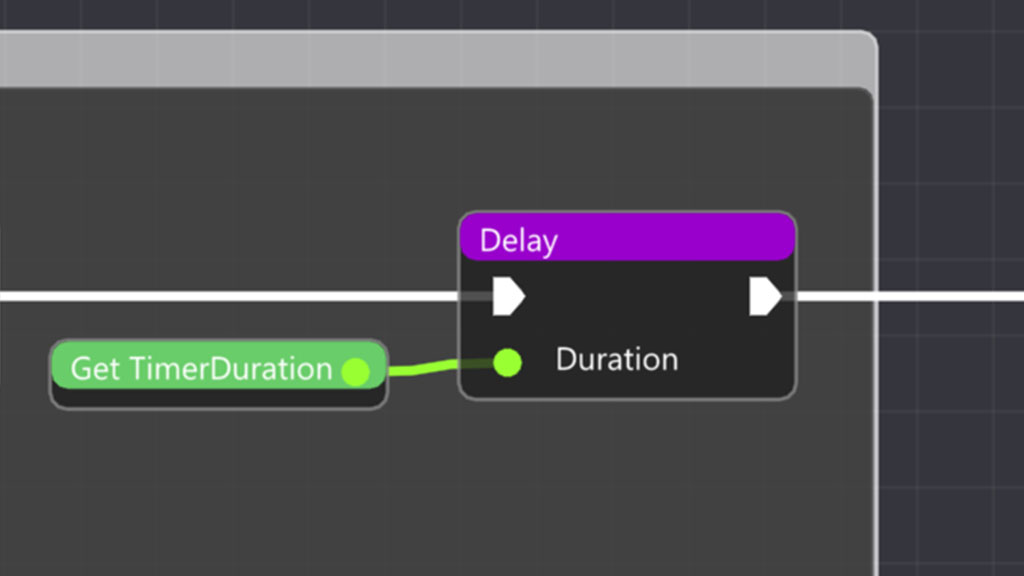
Creation of a function
Delay the execution an inputted amount of time
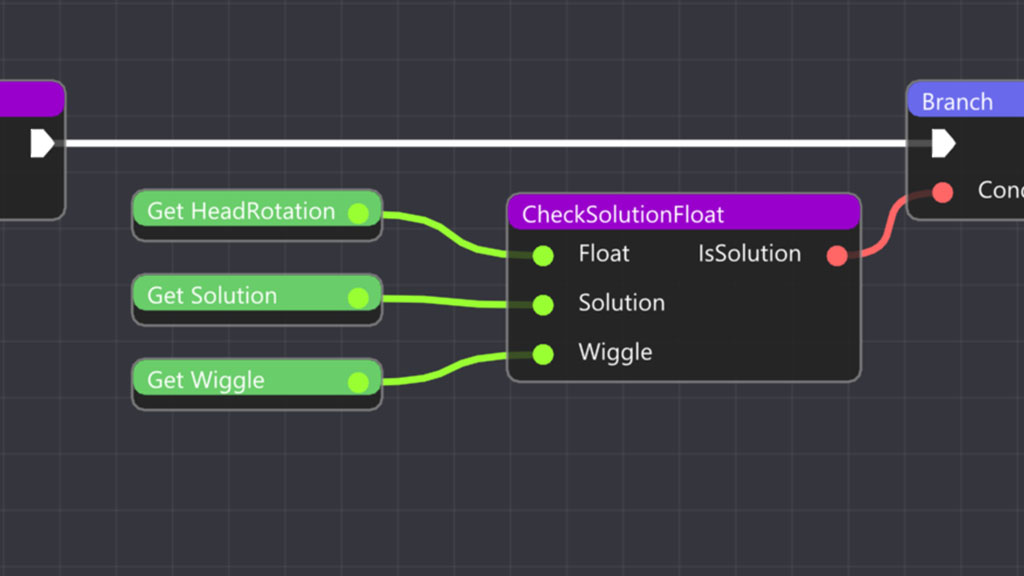
To easily check for a solution
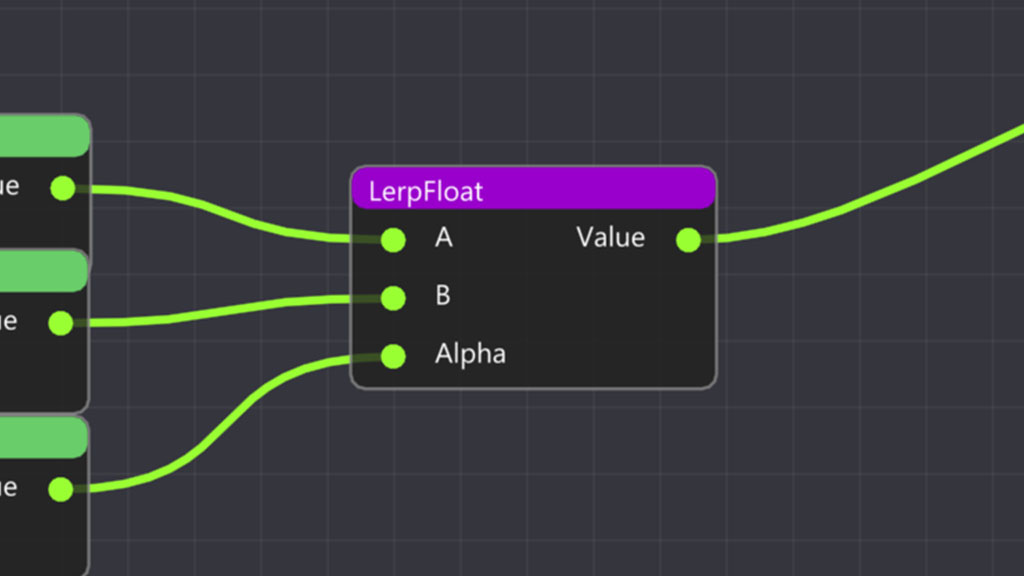
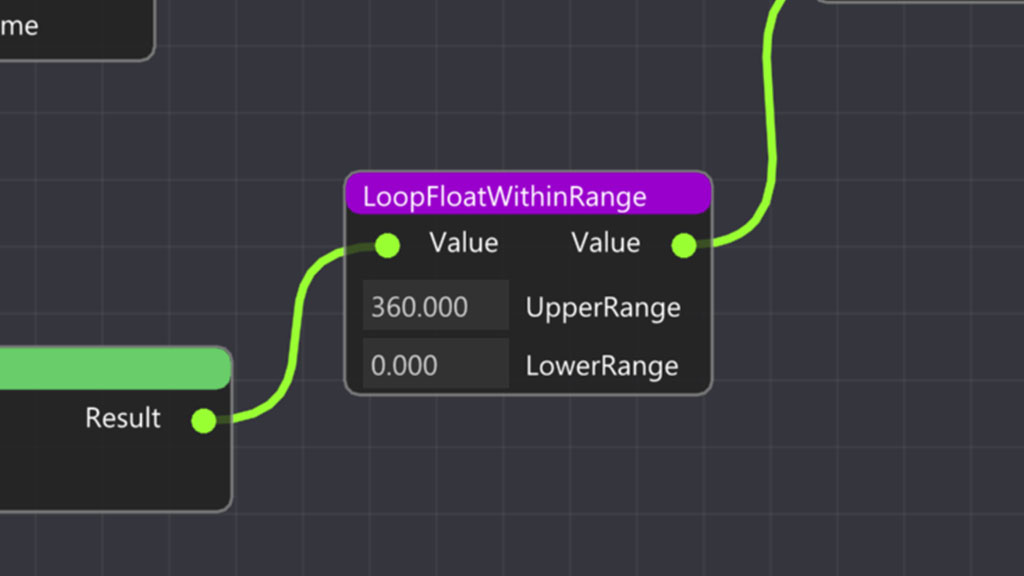
Simple lerp function to interpolate between A and B through an alpha
This was helpful when rotating things and needing them to be within a certain range
LerpFloatDuration
LerpFloatDuration lets me lerp a float from A to B during an inputted time. This meant that I could easily crank out simple animations without the help from other disciplines. It also has features such as lerping linearly or according to a sinus curve, which would make the start and end smooth. Another useful feature is the ability to reverse the lerp. This was especially useful when opening and closing doors, as I just had to use one node instead of two.
DrawClue
DrawClue was another function which streamlined the process. With it I could write clues on the screen when the player accessed a puzzle and easily input which row and color the text would have. This helped me not worry about formatting and consistency in font and placement as it was all done in the function itself.
Let’s talk doors
Doors are prominent throughout the game and open when the player solves a puzzle, or through triggered events. It was therefore important to make the use of doors as simple and straightforward as possible. When placing a door in Unity there are three variables to keep track of. You open or close a door by sending a signal to it, and then let the door itself keep track of animation, rotation and sound.
Variables to change in Unity
Door opening animation
Sound
I stood for all the Visual Scripting implementation of the sound system, and parts of placing sounds in the world through Unity.
SoundTrigger
Using the SoundTrigger prefab anyone can easily trigger a sound or voiceline through Unity. They would simply have to place the SoundTrigger, enter the wanted sound and settings and voila!
There are two modes, 2D sound or 3D sound. The 3D sound is affected by distance and position, whilst the 2D sound isn’t.
GIF showcasing placement and configuration of SoundTrigger
Sound- & Ambiencetracks
Soundtracks and ambience tracks work a bit differently than normal sounds. They should loop until they change, and the transition between different sounds should be smooth. Therefore I added functionality to fade one track to another during X amount of seconds.
SoundtrackTrigger
The SoundtrackTrigger prefab let us place a triggerbox in Unity which would activate either a soundtrack of ambience track when triggered. It contains several variables that control which sound should be played, how long the fade should be between the new and old sound and simple variables such as volume and pitch.
GIF showcasing placement and configuration of SoundTrackTrigger
One important variable that I first didn’t expect was the ability to trigger the same SoundtrackTrigger several times. This was useful when walking between different areas that needed different sound- and ambience tracks. To make sure the current sound- and ambience track didn’t restart every time the SoundtrackTrigger was triggered I check if the incoming request to play a track is the same as the one already playing, then I should simply do nothing.
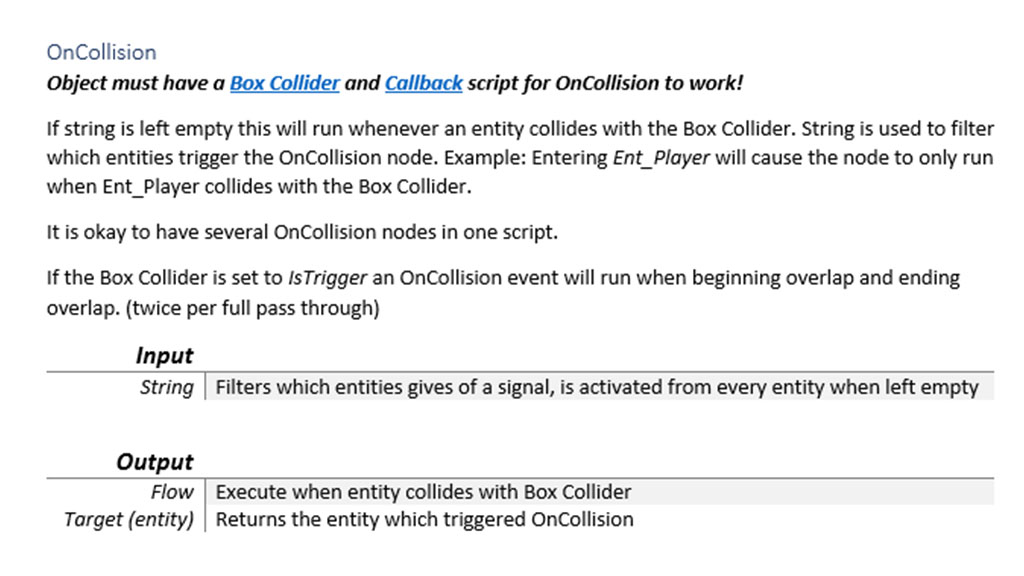
Documentation
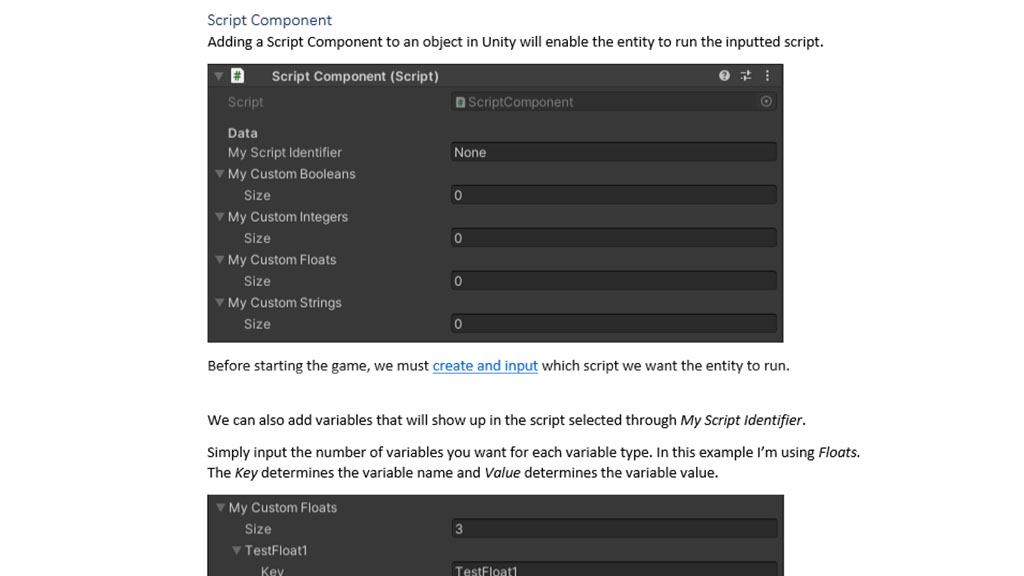
Since this scripting system will also be used in later games, I made sure to write extensive documentation. Not only do I go through every node and function that exists for the Visual Scripting system, but I provide some guides of how to use the it. These guides include how to set up your first script and scripting window, what components exist in Unity and how to use them but also what the different variable types are and how to use them.